Pay in installments of $6.50 with
 ,
,
 and
and

Shipping Estimate
USA
- USA
- CAN
- USA
- CAN
Ships within 48 hours · Estimated delivery Aug 9 - Aug 14
 Promo Codes Available:
For Your Every Summer RSVP, with Code: SUMMER15
Description
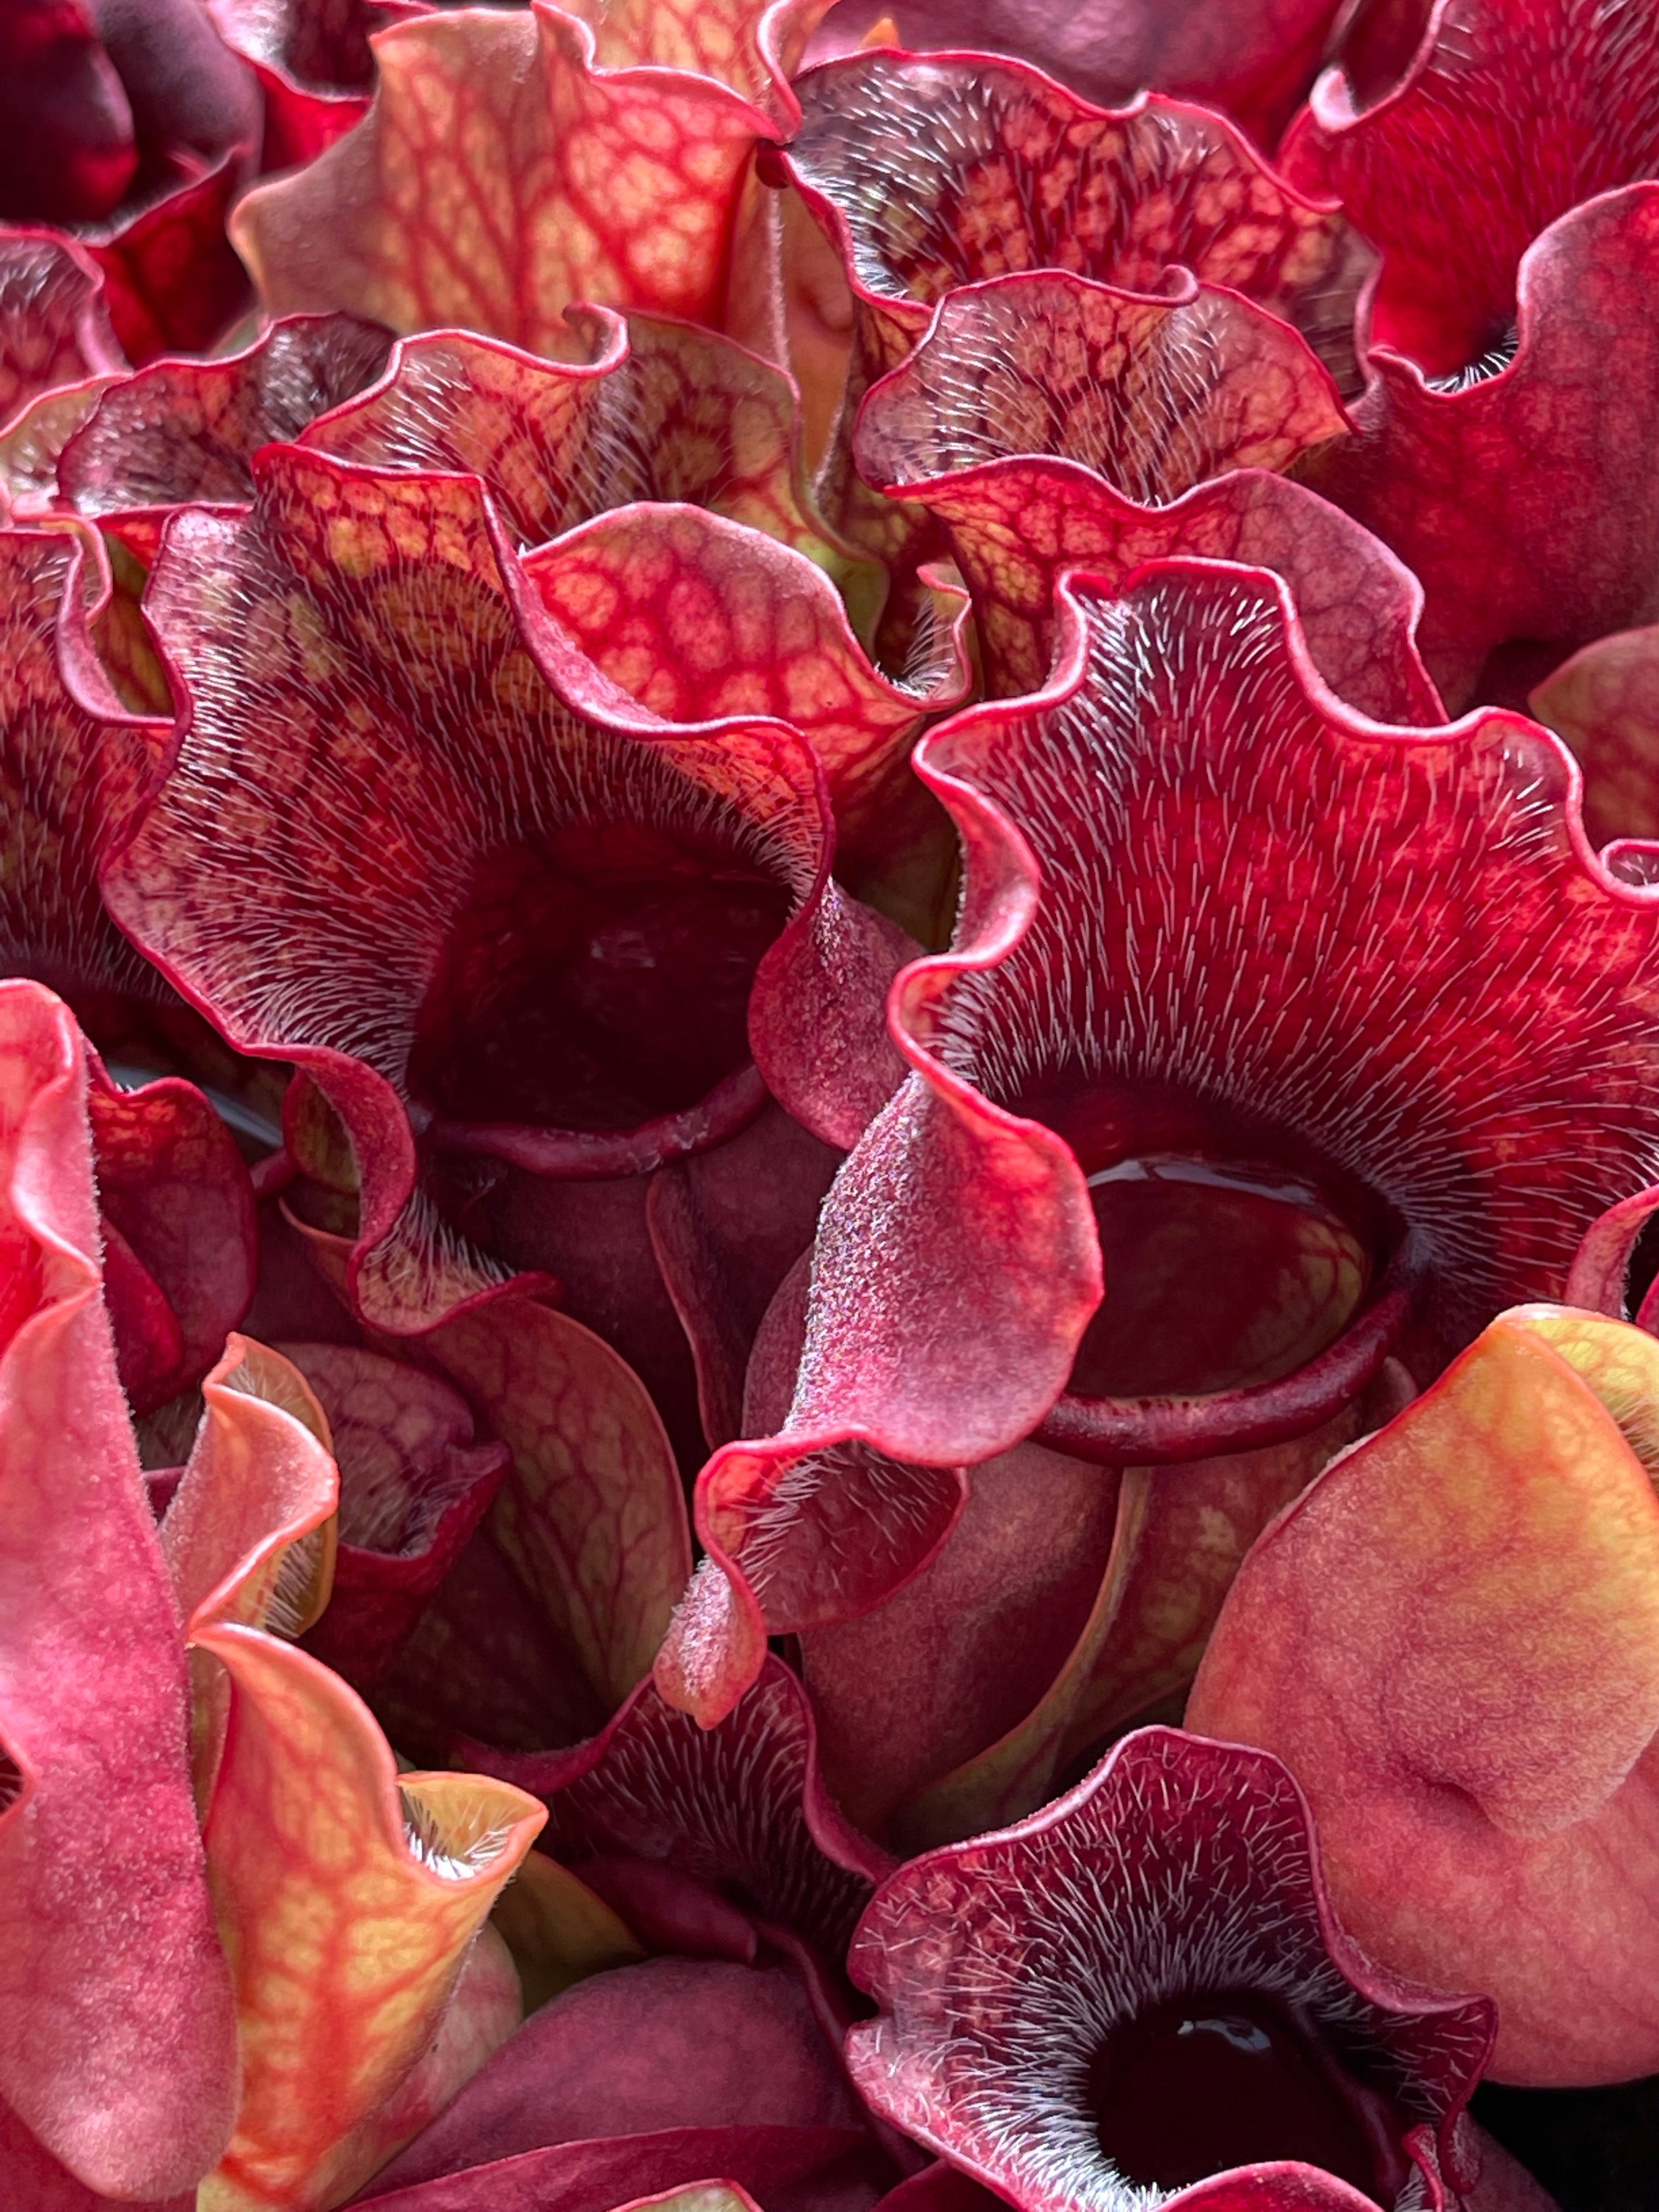
venosa succulent Sarracenia purpurea ssp. venosa TC PottedSarracenia purpurea ssp. venosa are always show stopping plants, intensely colorful with large, gently undulating pitchers and forming large rosettes in their pots. There's something so charismatic about purpurea; a pot that slowly fills in with their ruffled, low pitchers is always spectacular! These plants don't grow very tall, so they are perfect if you'd like a shorter Sarracenia. They often keep pitchers through their winter dormancy. Watering
Sarracenia purpurea ssp. venosa are always show-stopping plants, intensely colorful with large, gently undulating pitchers and forming large rosettes in their pots. There's something so charismatic about purpurea; a pot that slowly fills in with their ruffled, low pitchers is always spectacular!
These plants don't grow very tall, so they are perfect if you'd like a shorter Sarracenia. They often keep pitchers through their winter dormancy. Watering these from overhead is best to help fill their pitchers periodically. These are tissue-culture plants.
DORMANT SEASONALLY, STARTING AS EARLY AS OCTOBER AND LASTING AS LATE AS MARCH, DEPENDING ON THE CONDITIONS AND SPECIES/HYBRID. The pitchers turn brown and die back to the rhizome, or non-carnivorous leaves (phyllodia) grow during this time. Please see the final photo to see how Sarracenia look when dormant. They will begin to grow vigorously again in Spring when photoperiods lengthen and temperatures increase.
Care Instructions:
Growth Habit: Sarracenia primarily grow along the Southeastern coastal plain of the United States. They grow pitchers, which are modified leaves, seasonally that can vary in height, color, and size depending on the species or hybrid. The pitchers can die back during the growing season, but new pitchers will grow throughout the spring and summer. The pitchers start to grow in spring, and many grow as the year progresses; in summer, they will be at their best. In summer, you may see brown or black on your pitchers, which can be normal nectar burn or crisping from heat. As Fall comes on, the pitchers may start to die back, turning brown, and by winter, many or all of the pitchers are brown, but the rhizome remains healthy and intact throughout winter dormancy even if you cannot see anything growing. Sarracenia have brown, black, or white roots and do not generally have many of them. The rhizome can be brown and still be healthy.
Sun: Full sun. Sarracenia require lots of direct sun to grow and form pitchers properly. In many areas, they can be grown outdoors in full sun. If you live in a very hot AND very dry place like Arizona or Sacramento, for example, you will want to grow your plants in full morning sun with protection from the afternoon sun or under 30% shade cloth. It is common for several pitchers to "burn" and die back when you first place your plant into the sun; your plant is acclimating to your conditions, and in most cases, new leaves will soon grow and be fully acclimated. Sarracenia can be grown indoors on extremely sunny windowsills that receive all-day sun, but they will require a grow light in most circumstances due to the amount of light the plant needs. Grow lights should be 6-12” from the plant, depending on the light, and on a 10-12 hour day length. Sarracenia generally are not a good candidate for a terrarium as they need intense light and get quite tall. Shorter species like Sarracenia purpurea will do better in a terrarium. Grow outdoors if possible for best results.
Water: Always keep them in a saucer with a few inches of distilled, rainwater, or reverse osmosis water. Never let them dry out, especially in the hot summer months. Sarracenia are bog plants that prefer water-logged conditions unless you live somewhere both very hot AND extremely humid, like Alabama. In that case, let the water tray dry out for a day or two between refills. Always use distilled, reverse osmosis, or rainwater only. These plants are sensitive to their water quality, and giving them mineral and salt-free water is very important. In winter, when the plants are dormant, you can let them dry out a bit between rain storms, but do not let the soil get so dry that it pulls away from the edges of the pots. Be sure to supplement water as needed in between rains in winter.
Temperature and Dormancy: These are warm-temperate plants, meaning they need warm summers and chilly winters. They should be grown outdoors year-round in areas with mild winters. They thrive in temperatures ranging from 20 degrees - 100F degrees and can take a brief freeze or high-temperature spike up to 105F degrees for a short period. If nighttime temps drop below 20 but rise again during the day above 40, your plant will be fine outside.
If you live in an area with very cold winters, where nighttime temperatures drop below 20 degrees for sustained periods, you have three options for providing them with winter dormancy: the garage method, mulching in, or the fridge method. Dormancy is triggered by a combination of exposure to shorter photo-periods and cooler temperatures in the 40-60's F. While you can skip a dormancy period once or twice, in the long term, your plant will begin to do poorly and will eventually die if you skip this crucial period.
The garage method: Bring your plant indoors to a sunny windowsill in an unheated room or garage, where the nighttime temperatures will dip down to 50-60F. Keep it well watered during this period, do not let it dry out, and put it outside again when the outside nighttime temperatures increase consistently above 20F.
The mulch method: Mulch them in very, very well outdoors. Pack at least four inches of mulch on top of the plants and all around the sides to prevent winds from chilling them and freezing the roots. You can also dig the pots into the ground and then mulch heavily on top.
The fridge method: remove the plants from pots, gently clean the roots of soil, wrap the roots in a bit of damp long-fibered New Zealand sphagnum moss, place the plants in a resealable bag, and put the bag into the refrigerator. Leave them in the fridge from October to February, periodically checking on them to ensure they are still moist and not growing mold or fungus. Pot them back up in February. You can vary the timing to align with your outside nighttime temperatures so that your plants can come out of dormancy when it is safe to place them back outside. You can leave them in the fridge for an extended period if you have very long winters.
Soil and Repotting: We prefer a mix of four-part fertilizer-free peat moss to one-part perlite. You can add our pre-made mix to your order here. You do not need to repot your plant when you receive it from us for at least a year, and we recommend against it during the spring-summer months. Repot Sarracenia every 1-3 years in winter when they are dormant. Avoid placing in excessively large pots; size up only a few inches at a time. They do well in tall pots. Soil can also develop a swampy smell, especially right after shipping, when the plant is wrapped in plastic and sealed. This is normal; these plants grow naturally in bogs and swampy conditions, and peat moss can develop a bit of an anaerobic smell, but this does not indicate a problem with the soil.
Feeding and Fertilizer: Sarracenia will catch plenty of food when grown outdoors. When grown indoors, they will significantly benefit from fertilizing, both a foliar fertilizer and feeding the pitchers. Plants grown outdoors will appreciate a foliar feed as well. Apply MaxSea fertilizer once per month to the foliage only. Dilute 1/4 teaspoon of MaxSea into one gallon of water and then apply to the pitchers, and inside the pitchers, with a mister bottle or a watering can. Osmocote slow-release flower and vegetable pellets can be dropped into the pitchers with a bit of distilled water. Pellets can burn the sides of the pitchers where they come to rest; that is normal.
More Information: For further information on dormancy, repotting, dividing, and more, check out our website or our YouTube channel.
Shipping Notes
- Free Standard Shipping on $100+ Orders to the USA.
- Except Preorder products are shipped in 48 hours.
- Delivery to the USA:
- Standard Shipping : 3-10 business days
- If time is of the essence, please consider selecting expedited delivery for faster service.
Exchange/Return Notes
- We offer a 30-day return/exchange service after receiving.
- Final sale items are not eligible for returns or exchanges.
- To process your return/exchange, please contact us at [email protected]
- Please click here for more details>>> Return & Exchange Policy